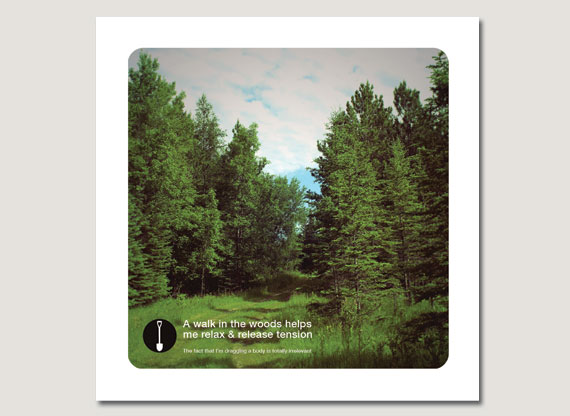
Here's another Instagram style cross processing effect but this time I gave the image rounded corners. I could crop the photo to have rounded corners effortlessly in Illustrator, so instead, I'm going to do it in Photoshop. I was inspired by WeGraphics treatment but I made quite a few changes.
The original image.
I cropped the image square since Instragram is square.
Duplicate layer - command j
Cross processing colors:
Adjustment layer, choose Curves
RGB slight curve down
Red, gentle s curve.
Green, slight s curve.
Blue, slightly larger s curve than the green channel.
You can see the colors have changed a lot.
Vignette:
Click on the adjustment layer icon. Choose gradient. Gradient black to transparent. Style radial, angle 90, scale 150, reverse, align with layer. OK. Change the opacity to 40%. I did the screen shot at 50% then decided later it was a bit much, you need to choose based on your image.
A screen shot of the layers panel
Gaussian Blur:
Go to the original duplicate layer, layer one.
Apply a blur. Filter > Blur > Gaussian Blur. Radius 3 pixels. OK.
Now we bring some of the photo back into focus. Make sure the color picker is set for black. Click on the layer mask icon. Use the paintbrush tool to paint where you want the image clear. If you make a mistake paint white and it brings the blur back.
I love the layers panel, it shows you everything that is going on. The black shows where I painted the layer mask.
You can quit here.
If you want rounded corners continue below:
Click on the top layer. Merge Visible to flatten the image for cropping. If you don't merge the image you have problems with the transparency. I'd suggest putting in an incremental save as ___ in case you have problems later since merging closes all those adjustable layers.
Duplicate the original layer. Command j.
Name the new layer rounded corners. Click the layer mask icon. Click the layer mask icon again which creates a vector mask. You know this mask is active if it has the bracelets around it. You might need to click off the first layer mask thumbnail to deactivate it after you make the vector mask.
Select the Rounded Rectangle Tool.
Click on the shape layers icon, make the radius 30 pixels.
Click on the vector mask icon in the Layers Panel thumbnails, a border will appear. Drag out the shape while holding the Shift key, this keeps the shape square.
You can now see a black line around the thumbnail image in the layers panel where it is masked.
Click on the eye in the layers panel for the background layer. This deactivates being able to see the layer and allows you to see the new rounded shape.
Now we're going to give it a white border.
Add a new layer over the original image in the Layers Panel.
Go to Image > Canvas Size. I'm increasing the image by 1 inch since my image is large. OK.
This is another screenshot that shows an incremental change. My original image was 11.111. I increased it to 11.611, viewed it, and increased the canvas to 12.111.
The canvas is currently transparent.
Go to Edit > Fill
Choose the Background Color (or foreground, whichever is white.)
Toss the Original Background Image.

A slightly snarky poster that is Available on Etsy which uses the above technique.


No comments:
Post a Comment